testshade: Shader Unit Tests, Texture Baking, and Benchmarks#
The OSL software distribution includes testshade, a command-line utility
written for OSL unit tests and as a “test harness” for executing shaders in
isolation from any particular rendering system.
testshade is very flexible, with many potential uses in a production
studio, including:
Unit testing production shaders (particularly utility shader nodes) without the overhead of a full render or the trouble of constructing a full scene.
Providing a “test harness” for debugging shaders (or OSL itself).
Baking procedural patterns into textures.
Benchmarking shaders and evaluating their performance, including comparative tests such as “is it faster to code it this way or that way?”
Exploring the inner workings of OSL’s runtime optimizer, to answer questions like: “will this idiom optimize away at runtime when I use the default parameter values?”
Running a Shader Once#
Let’s run testshade on a simple shader:
shader hello (float a = 0, float b = 1)
{
    printf ("hello, a+b = %g\n", a+b);
}
Compile your shader as usual:
$ oslc hello.osl
Compiled hello.osl -> hello.oso
Now run the shader in the testshade harness:
$ testshade hello
hello, a+b = 1
Setting Parameters#
You can set the value of shader parameters (that is, per-material instance value overrides of the default values) using
--param name value
prior to the name of the shader to load. For example,
$ testshade --param a 3.14 --param b 5.0 hello
hello, a+b = 8.14
The type of data you pass is inferred from the value’s format:
Formatting |
OSL type |
Example |
|---|---|---|
single whole number |
|
|
single number with decimal |
|
|
three comma-separated numbers (no spaces) |
|
|
16 comma-separated numbers (no spaces) |
|
|
anything else |
|
|
Be careful to match the types of your parameters correctly, or you will see
an error like this (note that we pass b as 5 rather than 5.0):
$ testshade --param a 3.14 --param b 5 hello
WARNING: attempting to set parameter with wrong type: b (expected 'float', received 'int')
hello, a+b = 4.14
For other types, or to resolve ambiguities (for example if you want three
numbers as float[3] rather than vector, or want to pass the string
"1" instead of an integer), specify the type explicitly using an optional
modifier --param:type=mytype:
$ testshade --param:type=color c 0,0,0 --param:type=string s "1" testshader
Saving Outputs to Images#
Most shaders don’t have printf() calls. Let’s consider a more typical
shader with real outputs and spatially-varying behavior:
shader show_uv (output color out = 0)
{
    out = color (u, v, 0);
}
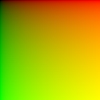
$ oslc show_uv.osl
Compiled show_uv.osl -> show_uv.oso

$ testshade -g 100 100 show_uv -o out uv.jpg
Output out to uv.jpg
Helpful command line arguments:
-gxres yresSpecifies the resolution of the “grid” to shade. For example,
-g 512 256will shade 512 horizontal samples by 256 vertical samples. The default is 1×1, shading only one location.-ovariable filenameSpecifies that variable (which must be a shader
outputparameter) should be saved to filename. You may have multiple-ocommands, each saving a different output variable to a different file.-ddatatypeBy default, image files save
floatdata. This option selects an alternative pixel data format. For example,testshade -g 100 100 show_uv -od uint8 out.tif
will ensure that
out.tifis written with 8-bit integer pixels.--printOverrides
-ooutputs to print values to the console instead of saving images. Useful only for very small grids.--offsetuvuoffset voffset--scaleuvuscale vscaleControls the range of the
uandvsurface parameters over the shading grid. The default has the leftmost column atu=0, the rightmost atu=1, the top scanline atv=0, and the bottom scanline atv=1.For example, to make the uv range go from 0–2 rather than 0–1:
testshade -g 100 100 show_uv --scaleuv 2 2 -od uint8 out.tif
Specifying Shader Networks#
testshade can specify and execute entire shader groups (networks of
shader nodes). Let’s make a simple shader network as an example.
We have the following shaders:
shader texturemap (string texturename = "", output color out = 0)
{
    out = texture (texturename, u, v);
}

shader contrast (color in = 0, color mid = 0.5, color scale = 1,
                 output color out = 0)
{
    color val = in - mid;
    val *= scale;
    out = val + mid;
}

shader noisy (point position = P, float frequency = 1,
              output color out = 0)
{
    point p = position * frequency;
    color fBm =        (color) snoise(p)
              + 0.5  * (color) snoise(p*2)
              + 0.25 * (color) snoise(p*4);
    out = 0.5 + 0.5*fBm;
}

shader umixer (color left = 0, color right = 0, output color out = 0)
{
    out = mix (left, right, smoothstep (0, 1, u));
}
And we wish to construct the following shader group:
 .------------.out     in.----------.out
 | texturemap +--------->| contrast +---.
 '------------'          '----------'    \ left .--------.out
                                          '---->| umixer +--->
                                  .------------>|        |
      .------------.out          /        right '--------'
      |   noisy    +------------'
      '------------'
Simple Networks on the Command Line: --layer and --connect#
For relatively simple networks, specify them on the testshade command
line using these commands:
--paramname valueSets a parameter of the next declared shader. You may intersperse
--paramand named shaders and set parameters separately for each of them. For example:testshade --param a 1 --param b 2 shader1 --param c 0 shader2
sets parameters
aandbof shader1 and parametercof shader2.--shadershadername layernameCreates a new shader node of the kind named by shadername, and binds any pending
--paramsettings to that shader node. The node is assigned the label layername, which may be used with--connectdirectives later on the command line.--connectlayer1 param1 layer2 param2Establishes a connection from shader layer1’s output parameter param1 to shader layer2’s input parameter param2. Both layers must have been named via
--shaderearlier on the command line.
The following declares the shader network described above:
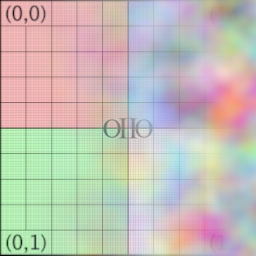
$ testshade --param texturename "grid.tx" \
            --shader texturemap tex1 \
            --param frequency 4.0 \
            --shader noisy noise1 \
            --param scale 1.0 \
            --shader contrast cont1 \
            --shader umixer mix1 \
            --connect tex1 out cont1 in \
            --connect cont1 out mix1 left \
            --connect noise1 out mix1 right \
            -g 256 256 -o out noisetex.jpg
Complex Networks: Deserializing with --group#
For very complex networks, specifying many --shader, --param, and
--connect directives on the command line is unwieldy. OSL supports
serialization of shader group declarations. Please refer to the
Describing shader groups chapter for details.
--groupgroupspecSpecify an entire shader network using OSL’s serialized shader group notation. The groupspec may be either the whole thing inline, or the name of a file containing the serialization.
The serialization corresponding to the shader group above is:
param string texturename "grid.tx" ;
shader texturemap tex1 ;
param float frequency 4.0 ;
shader noisy noise1 ;
param float scale 1.0 ;
shader contrast cont1 ;
shader umixer mix1 ;
connect tex1.out cont1.in ;
connect cont1.out mix1.left ;
connect noise1.out mix1.right ;
And so the equivalent command is:
$ testshade --group noisetex.shadergroup -g 256 256 -o out noisetex.jpg
Shader Unit Testing#
You can use testshade to run quick tests to verify the behavior of your
shaders, for example as part of a testsuite. Using testshade can be much
more convenient than testing in a renderer — you can easily run it on one
or a few points, it will execute very quickly, you do not need to build a
“scene” or invoke the whole renderer, and it is much more straightforward
to run test cases involving specific values.
Let’s construct a concrete example:
shader clamped_mix (color in1=0, color in2=0, float mask = 0,
                    output color out = 0)
{
    out = mix (in1, in2, clamp(0, 1, mask));
}
We think about this shader and come up with several test cases:
mask=0, should return in1
mask=1, should return in2
mask=0.5, should return the average
verify that mask < 0 clamps to in1
verify that mask > 1 clamps to in2
So our unit test script might look like this:
testshade --print --param in1 1,2,3 --param in2 4,5,6 --param mask 0.0 clamped_mix -o out out.exr
testshade --print --param in1 1,2,3 --param in2 4,5,6 --param mask 1.0 clamped_mix -o out out.exr
testshade --print --param in1 1,2,3 --param in2 4,5,6 --param mask 0.5 clamped_mix -o out out.exr
testshade --print --param in1 1,2,3 --param in2 4,5,6 --param mask -1.0 clamped_mix -o out out.exr
testshade --print --param in1 1,2,3 --param in2 4,5,6 --param mask 2.0 clamped_mix -o out out.exr
Resulting in:
Output out to out.exr
Pixel (0, 0):
  out : 4 5 6
Output out to out.exr
Pixel (0, 0):
  out : 4 5 6
...
Wait — that’s not right at all!
Good thing we unit-tested this shader. Do you see the bug? We wrote the
arguments to clamp() in the wrong order. Here is the correct shader:
shader clamped_mix (color in1=0, color in2=0, float mask = 0,
                    output color out = 0)
{
    out = mix (in1, in2, clamp(mask, 0, 1));
}
And the new output from our tests is:
Output out to out.exr
Pixel (0, 0):
  out : 1 2 3
Output out to out.exr
Pixel (0, 0):
  out : 4 5 6
Output out to out.exr
Pixel (0, 0):
  out : 2.5 3.5 4.5
Output out to out.exr
Pixel (0, 0):
  out : 1 2 3
Output out to out.exr
Pixel (0, 0):
  out : 4 5 6
That’s better. Unit tests are great!
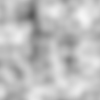
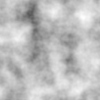
We can also debug visual patterns. Let’s look at a shader that computes fractional Brownian motion:
shader fBm (point position = P, int octaves = 4, float lacunarity = 2,
            float gain = 0.5, float offset = 0.5,
            float amplitude = 0.5, float frequency = 1,
            output float out = 0)
{
    point p = position * frequency;
    float amp = amplitude;
    float sum = offset;
    for (int i = 0;  i < octaves;  i += 1) {
        sum += amp * snoise (p);
        amp *= gain;
        p *= lacunarity;
    }
    out = sum;
}
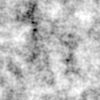
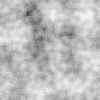
We construct a number of unit tests to ensure that each parameter produces the visual control we expect:
SETUP="-g 100 100 --scaleuv 4 4"
testshade $SETUP fbm -o out fBm_default.jpg
testshade $SETUP --param octaves 2 fbm -o out fBm_octaves.jpg
testshade $SETUP --param lacunarity 4.0 fbm -o out fBm_lac.jpg
testshade $SETUP --param gain 0.75 fbm -o out fBm_gain.jpg
testshade $SETUP --param frequency 0.25 fbm -o out fBm_freq.jpg

Procedural Texture Baking#
The previous example might make you wonder: can I use testshade to “bake”
an expensive procedural pattern into a texture, and at runtime do a single
texture lookup as a simpler and less expensive alternative? As a bonus, the
texture lookup will be automatically antialiased, whereas a procedural
pattern often requires great care to analytically antialias.
Evaluating Like a Texture, Rather Than a Geometric Grid#
When we use -g x y to set the resolution of the evaluation grid, by
default the u and v values are set up as if evaluating a geometric
mesh, with the first and last samples exactly on the uv boundaries.
For example, testshade -g 2 2 does 4 evaluations with u,v coordinates at
(0,0), (1,0), (0,1), and (1,1). This is great for unit testing, but
doesn’t correspond to pixel center locations.
--centerAdjust the
uandvvalues to be at pixel centers as if the grid truly represented a texture.
With testshade -g 2 2 --center, the 4 evaluations will have u,v
coordinates of (0.25,0.25), (0.75,0.25), (0.25,0.75), and (0.75,0.75).
Here’s an example of converting OSL’s pnoise (periodic noise) function
into a texture:
shader makenoise (float frequency = 32,
                  output float out = 0)
{
    out = pnoise (u*frequency, v*frequency,
                  frequency, frequency);
}
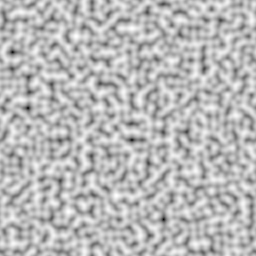
$ testshade -g 1024 1024 --center makenoise -o out noise.exr
$ maketx noise.exr -wrap periodic -d uint8 -o noise.tx
Baking Simple Expressions#
For short shaders that are really just evaluating a single expression,
testshade can create an image without saving the OSL source to a file,
compiling it, and running it as separate steps.
--expr "expression"Simply evaluate a code expression that assigns to a variable called
result(which is acolor), for each point being shaded.
Example:
$ testshade -g 1024 1024 --center \
    --expr "result = (float)pnoise(u*32,v*32,32,32);" -o result noise.exr
Benchmarking Shaders#
Basic Shader Benchmarking#
Additional command line options helpful for benchmarking:
--itersnRuns the whole grid of shaders \(n\) times. Useful when, even with a large grid, you want the benchmark to run longer to get more accurate times.
-tthreadsControls the number of threads used. The default is automatically detected based on your hardware profile. Explicit control can be helpful when benchmarking.
Example: Which Is More Expensive, fBm or Texture?#
$ time testshade --center -g 1024 1024 -t 1 --iters 100 fBm -o out fBm.tif
real    0m20.492s


$ time testshade --center -g 1024 1024 -t 1 --iters 100 \
    --expr "result = (float)texture (\"fBm.tx\",u,v);" -o result fBm-tex.tif
real    0m32.663s
We can also measure the “overhead” of testshade itself (iterating, setup,
retrieval of outputs, image output, etc.) by running a trivial shader:
$ time testshade --center -g 1024 1024 -t 1 --iters 100 \
    --expr "result = 0;" -o result null.tif
real    0m6.429s
Computing 4 octaves of noise is \((20.5-6.4)/(32.7-6.4) = 53\%\) of the speed of a single texture lookup, so baking that pattern would not be a wise optimization.
But if we needed 8 octaves of fBm:
$ time testshade --center -g 1024 1024 -t 1 --iters 100 \
    --param octaves 8 fBm -o out fBm.tif
real    0m34.532s
So 8 octaves of noise is definitely more expensive than a single texture lookup.
Controlling Optimization#
-O0 -O1 -O2Sets runtime optimization level. The default is 2, which applies all reasonable optimizations (just like in production). Setting a lower level (
-O1) or turning off almost all runtime optimizations (-O0) can help understand exactly how much the optimizations change performance, or rule out suspected bugs in the optimizer.
Lockgeom Parameters#
One of the most important runtime optimizations OSL performs is to take any parameters whose values are known at that time and turn them into constants that can be propagated to all computations involving that parameter.
If you are benchmarking a shader which in typical production use will have a parameter connected to an output of an upstream shader that computes something spatially-varying (and therefore not able to turn into a constant), it is important for your benchmarks to understand shader performance under that condition, and not be misled by allowing the parameter to be optimized away.
Recall that OSL’s runtime assumes that parameters are not by default able
to be overridden by interpolated per-geometric-primitive data (i.e.,
lockgeom=1). The alternative override, lockgeom=0, means that the
value may vary across the geometry.
Declaring a parameter as lockgeom=0 has the effect we want for this
purpose: it prevents the runtime optimizer from assuming that the
parameter’s value is a known constant. This is easily achieved via an
optional modifier to --param:
--param:lockgeom=0name valueDeclares the parameter and its value, and marks it as
lockgeom=0, preventing the runtime optimizer from assuming a known constant value for the parameter. You can combine this with:type=by appending:--param:type=color:lockgeom=0
Only you know which shader parameters are likely to be connected to
non-constant values from earlier layers when used in real production
material networks. It’s up to you to tell testshade which parameters
fall into this situation. At the same time, be careful not to inadvertently
set lockgeom=0 for parameters that will typically be set to constant
instance values — you also don’t want your benchmarks to incorrectly
disable optimizations that would typically happen at render time.
Full Statistics Log#
--runstatsPrints the full OSL shading system statistics, and also if your shaders access any textures, the full OpenImageIO texture system statistics.
Here’s an example:
$ testshade -t 1 --runstats --group noisetex.shadergroup -g 1024 1024 -o out noisetex.jpg

Output out to noisetex.jpg

Setup: 0.10s
Run  : 0.81s
Write: 0.07s

OSL ShadingSystem statistics (0x7f8399092400) ver 1.9.0dev, LLVM 4.0.0
  Options:  optimize=2 llvm_optimize=0 debug=0 profile=0 llvm_debug=0
            ...
  Shaders:
    Requested: 4
    Loaded:    4
    ...
Exploring OSL Runtime Optimization#
--debugShows the “oso” (OSL’s assembly language for its virtual machine execution model) of each shader in the network before and after the runtime optimization step.
--debug2In addition to
--debugoutput, includes messages explaining every optimization performed.
Let’s use a small shader network of a texture lookup node connected to a
contrast adjustment node, run with --debug:
$ testshade --debug --param texturename "grid.tx" --shader texturemap tex1 \
            --shader contrast cont1 --connect tex1 out cont1 in \
            -g 256 256 -o out out.jpg
In addition to timing and statistics, you will see the code pre- and post-optimization:
About to optimize shader group
Before optimizing layer 0 "tex1" (ID 2) :
Shader texturemap
  symbols:
param string texturename
    value: "grid.tx"
oparam color out
  code:
(main)
    0: texture out texturename u v
    1: end

--------------------------------

Before optimizing layer 1 "cont1" (ID 3) :
Shader contrast
  symbols:
param color in (connected)
param color mid
    default: 0.5 0.5 0.5
param color scale
    default: 1 1 1
oparam color out
  code:
(main)
    0: sub val in mid
    1: mul val val scale
    2: add out val mid
    3: end

--------------------------------

After optimizing layer 1 "cont1" (ID 3) :
Shader contrast
  code:
(main)
    0: useparam in
    1: assign out in
    2: end
Notice that the math for “layer 1” started off with sub/mul/add operations,
and after optimization was reduced to a single copy of in to out — the
optimizer constant-folded away all the math because scale=1 and mid=0.5
canceled each other out.
Using --debug2 will additionally include messages explaining each
optimization step:
layer 1 "cont1", pass 0:
op 1 turned 'mul val val $newconst3' to 'assign val val' : A * 1 => A
op 1 turned 'assign val val' to 'nop' : self-assignment
layer 1 "cont1", pass 1:
op 2 turned 'add out val $newconst2' to 'assign out in' : simplify add/sub pair
op 0 turned 'sub val in $newconst2' to 'nop' : simplify add/sub pair
...
One of the strengths of OSL is that you can write a shader with lots of options and parameters which, if left in their unused/default state, will optimize away completely and have no runtime execution penalty. Using the debug options lets you verify that OSL runtime optimization is simplifying your shaders in the manner you expect.
Conclusion#
Using testshade you can:
Create fast unit tests for your shader node library to verify correct operation with input test cases, independent of any renderer.
Test shader nodes or entire shader networks to view output directly or compare to reference imagery for correctness or regression testing.
Generate image swatches for shaders, useful for documentation.
“Bake” procedural patterns into texture maps.
Benchmark shaders to ensure no performance regression, to compare different hardware platforms, or to compare versions of OSL against each other for performance improvement.
Benchmark different shader coding approaches against each other to know what shader idioms execute faster or slower.
Understand deeply what runtime optimizations OSL is performing.
Verify that your shaders are optimizing in ways you expect, such as ensuring that unused/default parameters get optimized away and have no runtime cost.
Test a suspected buggy shader (or buggy shading system!) independent of any renderer.