osltoy: Interactive Shader Editor and Visualizer#
osltoy is an interactive editor and realtime visualizer for OSL shaders.
It is inspired by Shadertoy by Inigo Quilez,
but uses a real VFX shading language!
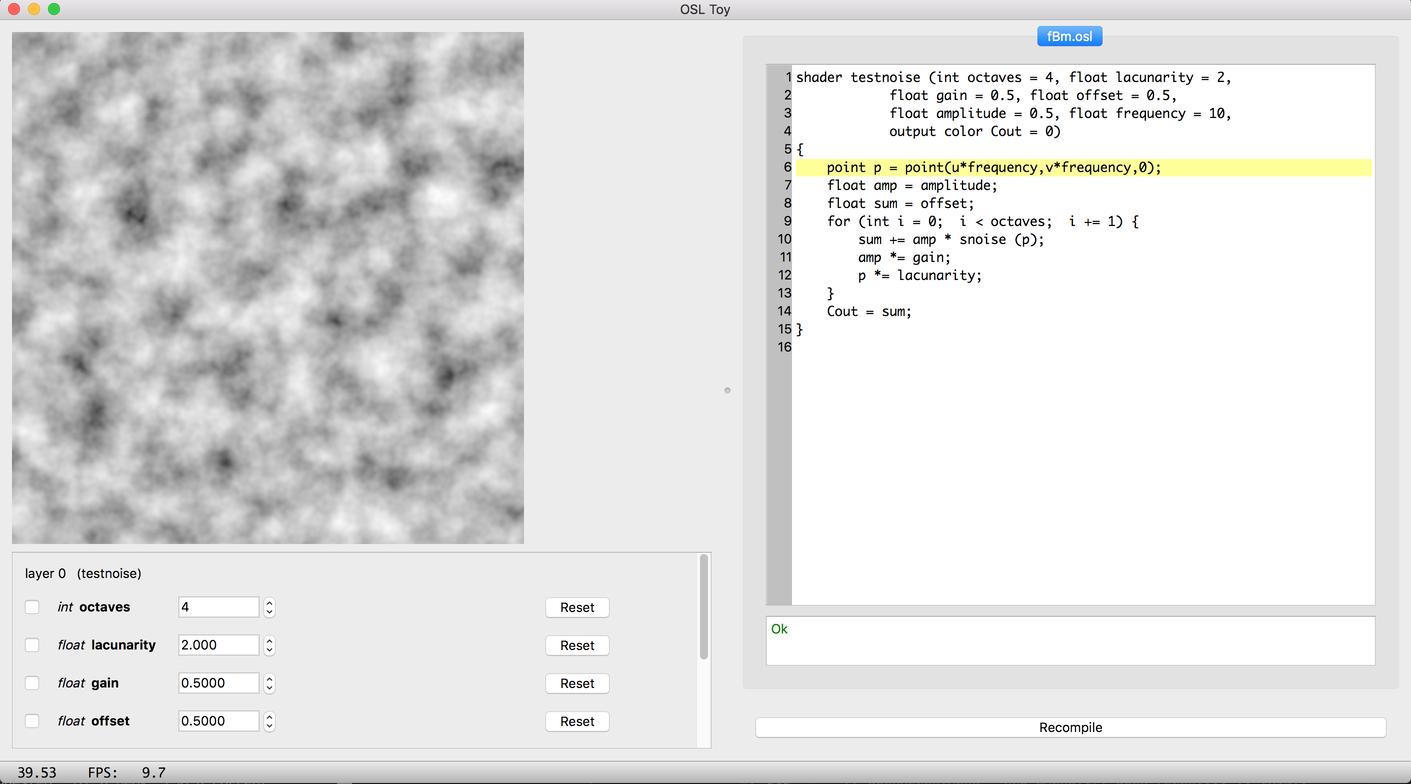
Command Line#
Launch osltoy from the command line:
osltoy [options] [filename.osl …]
Command line options:
--helpPrint command line options and other help.
-vVerbose mode.
--resxres yresSpecifies the resolution of the render window (default: 512 × 512).
--threadsnSpecifies the number of simultaneous threads to use for shading. If not specified, it will use all available hardware cores.
- filename.osl
If one or more filenames of shader source code are specified, they will be loaded into editor tabs upon startup.
osltoy Basics#
First, let’s launch osltoy:
$ osltoy
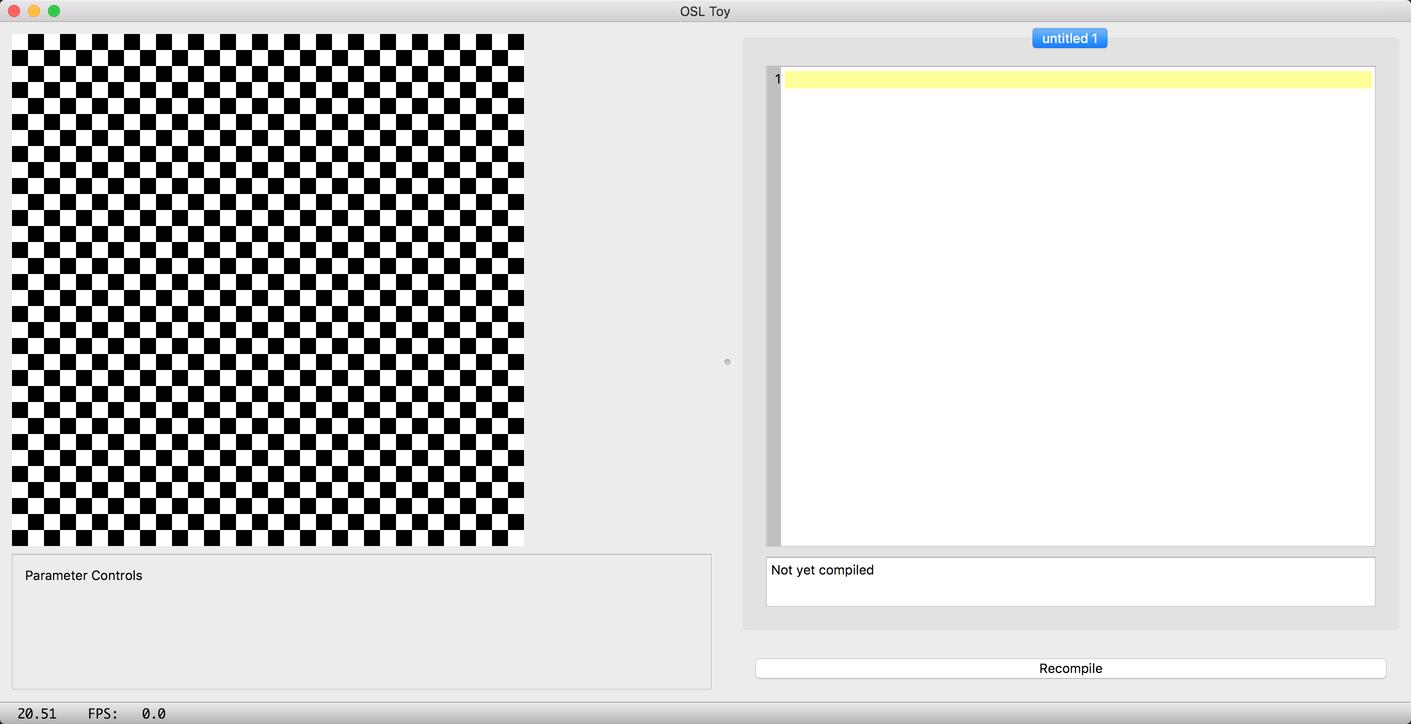
This will start a new osltoy session. On the right half of the GUI is a
code editor window. Below the code editor is an area that will show any
compilation errors. The left half of the GUI displays the results of the
shader (a checkerboard if no shader has been compiled yet). Below that is
an area that will hold widgets to allow adjustment of shader parameter
values.
At the very bottom of the app window is a status bar showing time, frames per second, and other status messages. At the very top (or, on macOS, at the top of the screen) is a menu bar with the usual set of common operations.
Loading and saving shaders#
You can load a shader one of three ways:
Specify the filename of an existing shader when you launch the app:
osltoy test.osl
From a blank window, load an existing shader by selecting
File→Open, or using the hotkeyCtrl-O(⌘-Oon macOS). This will present a file selection dialog.Just start typing in the editor window.
You can save the edited shader with File → Save or Ctrl-S (⌘-S
on macOS). If the file does not yet have a name, you will be presented
with a file save dialog (as you will if you use File → Save As).
Note
Throughout this document, Ctrl-key combinations correspond to ⌘-key
on macOS.
Compiling shaders#
When you have loaded or edited your OSL source code, you can compile the
shader with Tools → Recompile shaders, by clicking the Recompile
button below the source code editor widget, or by using the hotkey Ctrl-R.
Warning
osltoy won’t compile a buffer that doesn’t have a filename ending in
.osl. If you started with a blank window, the buffer won’t have a name
until you save the first time.
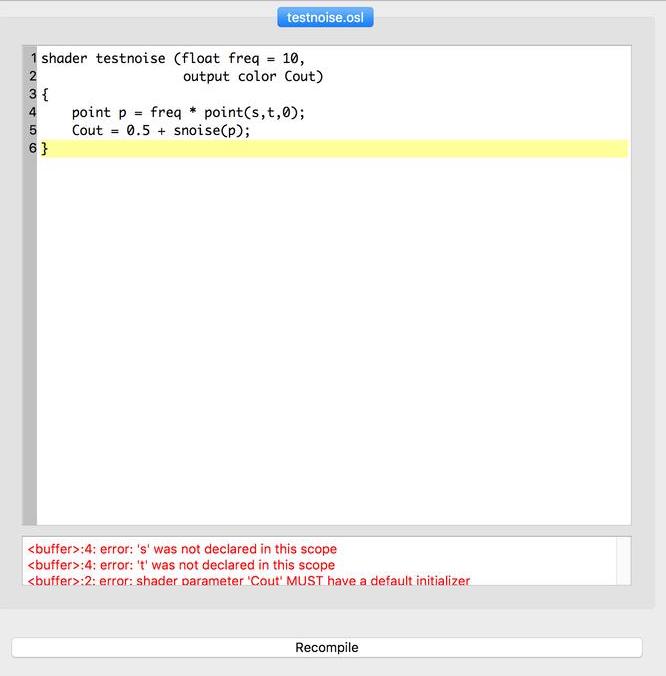
In the compilation status window below the editor, you will either see an
Ok message if the compiler succeeded, or the error output from the
compiler:
Warning
osltoy appears to let you load or create multiple shaders in a tabbed
editor. This will eventually support editing whole shader groups, but
currently only the shader in the first tab will be compiled and executed.
Executing shaders and interactive changes#
Once you compile the shader successfully, it will execute and display the results of shading a rectangle.
As soon as you recompile, the shader will be executed and displayed as an image on the left, with shader parameter adjustment widgets below it.
Every time you change a parameter value through its widget, the shader will
automatically recompile and re-execute. If you edit the shader text,
clicking Recompile or using Ctrl-R will recompile and re-execute.
Shader Inputs and State#
The shader is executed on every pixel of an image (defaulting to 512×512,
but changeable via the --res command line flag).
The float u and v global variables vary from 0 to 1 across the
rectangle.
The point P global variable will be set to (x, y, 0), where x is
the pixel horizontal coordinate (0 to xres-1, left to right) and y is
the pixel vertical coordinate (0 to yres-1, top to bottom).
The float time global variable contains the time (in seconds) since the
last time the shader was recompiled. Making your shader change its behavior
based on time creates an animated shader.
Shader Outputs#
The color displayed is taken from the shader output parameter declared as:
output color Cout = 0
Whatever you place in that output will be the color displayed at each pixel of the output image.
Note
Your shader does not need to set Ci or deal with closures. osltoy is
just for exploring pattern generation, not illumination. It has no notion
of 3D geometry or lights.
Shader Execution#
If your shader does not reference the time variable in any way, it will
only be executed once each time it recompiles. If time appears in your
shader, it will execute repeatedly, as quickly as possible, until you exit
or recompile.
Shader execution will by default use enough threads to keep all your cores
busy. The --threads command line option can limit the number of cores (or
“over-thread”).
Caveats and Limitations#
These are current limitations that will be fixed over time.
The GUI seems to let you open multiple editor tabs, but currently only the first tab (farthest to the left, with a name ending in
.osl) will compile and execute.We intend to add “Pause” and “Reset” buttons to control time.
Parameter adjustment widgets are still being refined to handle varying value ranges correctly.
There is not yet a way for the shader to receive information about external events such as mouse clicks or key presses.
There is not yet a way for the shader to have state that persists between frames.
Things to Try#
Try this:
osltoy <osl_install_directory>/shaders/mandelbrot.osl
Use the global
timevariable to make animated patterns.Explore noise functions and other pattern generation interactively.
Keep an eye on the “FPS” reading at the bottom to see what shader operations are fast and what is slow.
Don’t forget that
texture()calls work inosltoy!osltoyis a great tool for learning or teaching OSL.The actual “geometry” is just a rectangle, but like with Shadertoy, you can make patterns that look like 3D geometry by implementing a simple ray tracer in the shader itself, or using other clever tricks.
Look at the many examples on Shadertoy for inspiration!
Make something and share it on the
osl-devmailing list!